
Few things are more frustrating on a hot day than a car AC system that blows warm air. While several issues can cause poor cooling, one of the most common culprits is a leak in the refrigerant lines or components. The refrigerant (often R134a or R1234yf in modern cars) is the lifeblood of the AC system, absorbing heat from the cabin and releasing it outside. When lines or seals develop cracks or wear out, this vital gas escapes, leading to a gradual or rapid loss of cooling power. Beyond discomfort, leaking refrigerant is harmful to the environment and can eventually damage the AC compressor if the system runs without sufficient lubrication contained within the refrigerant.
The Detective Work: Identifying the Leak
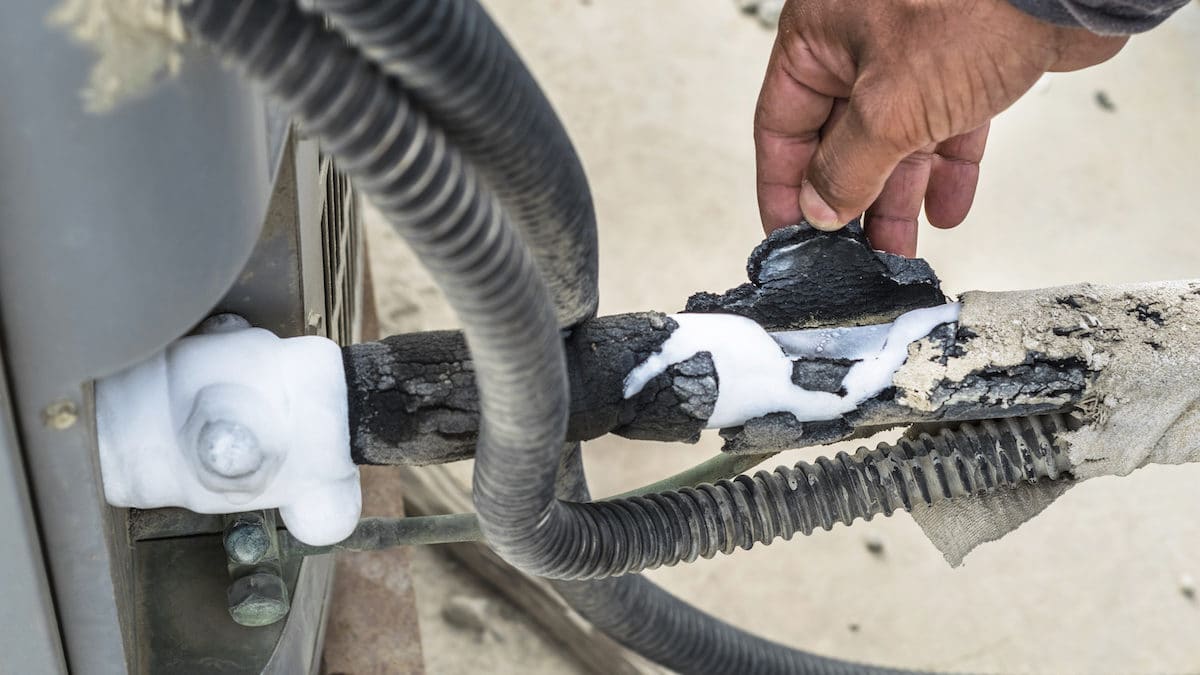
Diagnosing a refrigerant leak is not as simple as looking for a puddle, as the gas evaporates quickly. Professional mechanics employ specialized tools and techniques to pinpoint the exact location of a leak. The process often begins with a visual inspection of hoses, fittings, and components for obvious signs of damage or oily residue (refrigerant oil often leaks with the gas). More advanced methods include introducing a UV leak detection dye into the system. After running the AC, technicians use a UV light and special glasses to spot the glowing dye at the leak site. Electronic leak detectors, or “sniffers,” are also highly effective, sensing the presence of refrigerant atoms in the air around components. For larger or elusive leaks, nitrogen pressure testing can be used to pressurize the system and listen or use a soap solution to bubble at the leak point. Look for the Auto AC Repair in Simi Valley, Ca based service in this case.
Sealing the Breach: Professional Repair Methods
Once the leak is accurately located, the repair strategy depends on the source. A simple O-ring seal at a connection might just need replacement – a quick and relatively inexpensive fix. If the leak is in a hose, the entire hose assembly must typically be replaced, as patching is rarely a reliable long-term solution. More complex leaks could involve replacing components like the condenser (often damaged by road debris), the evaporator core (a dashboard-out job), or even the compressor itself if its seals have failed. Professional repair ensures that the faulty part is correctly identified and replaced with a quality component, preventing the leak from recurring shortly after the repair. It’s crucial to repair the leak before recharging the system.
Vacuum and Recharge: Completing the Service
Repairing the leak is only part of the job. After the affected part is replaced or sealed, the system must be evacuated using a vacuum pump. This critical step removes any air and moisture that entered the system during the repair process. Moisture can react with refrigerant to form corrosive acids that damage components over time. Once the vacuum holds, indicating a sealed system, the correct type and amount of refrigerant and lubricating oil are carefully measured and recharged into the system according to the manufacturer’s specifications. Over or undercharging can compromise performance and efficiency.
